How they did it
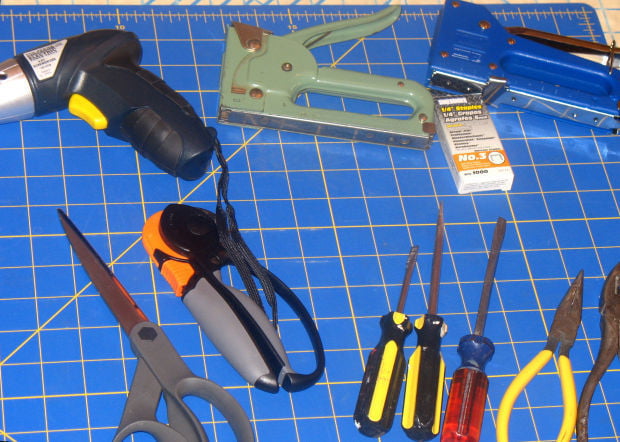
1. What you'll need: Fabric. We took a chair seat into Fabrics That Go, 3105 N. Campbell Ave.,fabrics that go 3105 n. campbell and a staff member figured out the yardage and helped us make an appropriate selection; foam if you are going to replace the innards of the seat; a screwdriver, electric or manual to remove and reattach the seats; a staple remover and needle-nose pliers; scissors and/or a rotary cutter; a heavy-duty stapler and extra staples; measuring tape; ruler, and straight pins. Ann works off her dining room table and lays down a cutting board for fabric, especially essential if you are going to use the rotary cutter.
A word about the padding: You only need to replace the foam if the seats have lost their comfort or have some serious sag. Foam padding will break down after years of sitting and spills. If you decide you need to change the padding, most fabric stores will help you select the style and will custom cut the foam. Watch for the technical device used to cut that foam — an electric kitchen knife.
2. Remove the current covers. This is an optional step. If you don’t need to replace the foam, you can cover right over the existing covers.
But you should definitely remove the existing covers if they are heavily-textured fabric and you're covering with a thinner, lighter fabric. The texture will give an uneven surface.
You'll also want to remove if there are stains that may bleed into the new fabric.
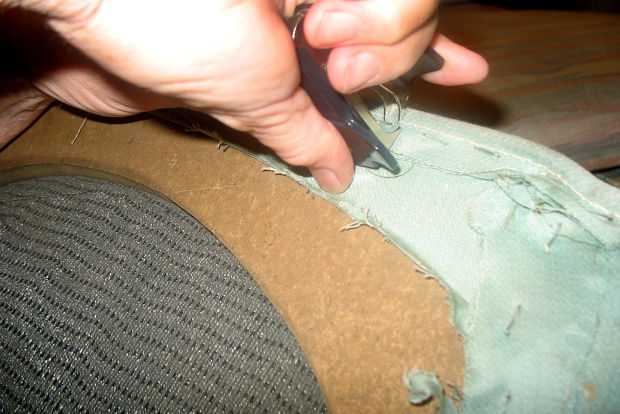
If you opt to remove the covers: Turn the seat over and you’ll find the material is stapled on — just what you’ll do with the new covers. Use a staple remover to pull out the staples — some may break off; this is where the needle nose pliers come in handy. If you have piping around the edges, remove that too.
A bonus to removing: You can use the existing material as a pattern to measure the new covering.
3. Measure the width, depth and length of the seat. Be sure to measure at the widest points. Add two inches to each side — the extra material you’ll need to fold over the edges of the chair.
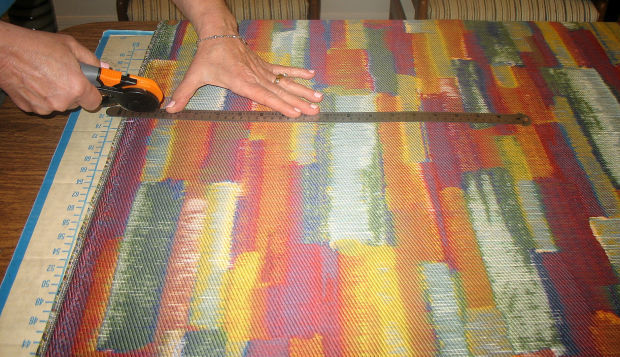
4. Cut the fabric. This can be tricky if you have a pattern that needs to be lined up, such as stripes or plaids.
If your fabric has a discernible design or there is an element you want to be prominent or centered, position the seat on the fabric and mark with pins before cutting.
Ours was a no-worry pattern — that is, there is nothing we had to match, but we did take care to make sure that we cut it so that the pattern was parallel to the chair frame. A ruler along side the scissors helped guide a straight cut.
The grainline of the fabric, parallel to the finished edge, should run lengthwise, front to back, of the seat cover.
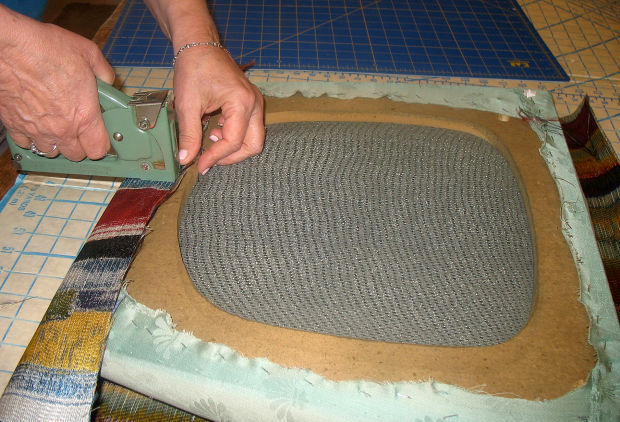
5. Attach the fabric. With your fabric wrong side up, put the seat in the middle, checking to make sure the material overlap on each side is enough to fold over. Fold the fabric over the edge of a side and staple from the center out toward the edge, stopping short of the corners. Repeat the process on the opposite side of the chair, then at the back and then the front side.
Tug tightly and check frequently to make sure you have not left any bubbles or wrinkles. Keep that staple puller handy in case you have to yank out a few to smooth the material.
The staples should be about ½ inch apart along the length of the fabric.
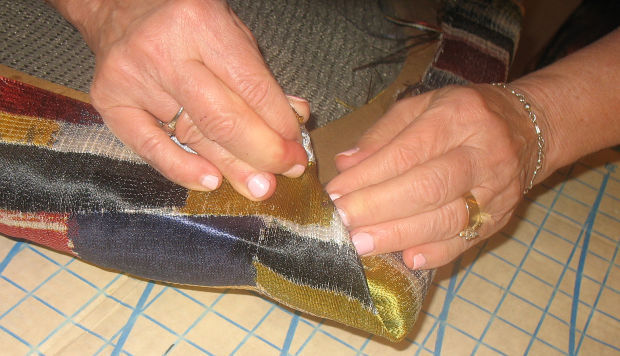
6. Conquer the corners. This may be the hardest part of all. Think of it as though you were folding over the corners of a gift you are wrapping, or a bit like folding hospital corners on a bed.
With the edge of the front or the back of the seat facing you, smooth the fabric from corner to corner along one edge of the seat frame. Fold one of the perpendicular edges of the fabric smoothly around the corner to create a 45-degree angle (approximately, no one's getting out a protractor). Fold and staple. Repeat on the other three corners, but you knew that.
You can also grasp one corner of your seat cover fabric, pull the point toward the center of the seat cushion and staple. Then arrange the remaining corner fabric into tiny pleats. Pull tightly and staple. Some brave souls clip the fabric at the corners so it lays smoother. That wasn't us, but it might be necessary if your fabric is especially heavy.
The thing to remember on the corners: Keep the right side of the fabric (the seat cover that will show) tight and straight. That means plenty of smoothing and pulling. On most chairs, the actual folds at the corners will be nestled into the chair frame and won't show.
Trim excess material from the underside of the seat. If your fabric is prone to raveling, you'll want to cover it with a piece of thin nonwoven fabric. Cut it about 1½ inches smaller than the seat, center this fabric over the bottom of the seat and staple close to its edge. It should overlap the new fabric about ½ inch, and cover the raw edge and staples.
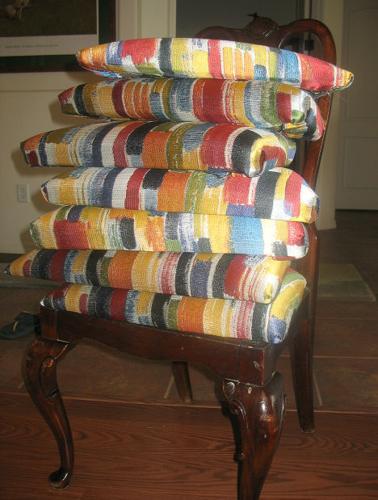
7. We’re almost done; screw the seats back in: Before screwing those seats back in, though, think back to what the chairs were like before you replaced the upholstery. Yup, a mess. Now is the time to spray fabric protector on them. Do this outside because of the fumes. Let the seatcovers dry. Screw the seats back in. Stand back and admire your work. Count the money you’ve saved doing it yourself.
And reacquaint the kids with napkin etiquette.
By Ann Brown and Kathleen Allen