

I love all kinds of French toast, from the classic version with slices soaked in custard to the fun pull-apart type. If you dip bread in custard and cook it in butter, I’ll always be first in line to load up my plate. While French toast is a great way to use up stale bread, I recently started making it with something else — and it resulted in a French toast so good my daughter asked for it three times in a week.
So, what was the tasty base for this French toast that got rave reviews? Croissants! These classic French pastries, with their flaky layers, cook up into crispy French toast with buttery flavor in each bite. The process is no different than with regular French toast, but the result is just a little bit more luxe and special with no extra effort. Here’s how to make the Frenchiest French toast ever.
Croissant French toast
Skip the fancy, pricier bakery croissants and use grocery store croissants. I recommend the larger croissants that are sometimes labeled jumbo.
People are also reading…
Servings: 4
Ingredients

Croissant French toast
- 4 large croissants (about 2.5 ounces each), preferably day-old
- 2/3 cup whole milk or half-and-half
- 3 large eggs
- 1 tablespoon packed light or dark brown sugar, or granulated sugar
- 2 teaspoons vanilla extract
- ¼ teaspoon ground cinnamon
- 1/8 teaspoon kosher salt
- 2 tablespoons unsalted butter, divided
For serving (optional)
- Powdered sugar, for dusting
- Maple syrup
- Whipped cream
- Fresh berries
Directions
Using a serrated knife, split 4 large croissants horizontally.
Whisk milk, eggs, brown sugar, vanilla extract, cinnamon and salt together in a wide, shallow dish (like a pie dish) until combined and no streaks of egg remain.
Melt 1 tablespoon of the unsalted butter in a large 12-inch nonstick or cast-iron skillet over medium heat. Meanwhile, place two of the croissant pieces in the egg mixture in a single layer. Gently press in and soak, flipping once, until drenched but not falling apart, 15 to 20 seconds per side. Transfer to a large plate or baking sheet. Repeat soaking two more pieces.
When the foaming in the pan subsides and the butter is sizzling but not browned, add the soaked croissant pieces in a single layer. Cook until golden-brown and crisp, 2 to 2 ½ minutes per side (reduce the heat as needed if it starts cooking too quickly). Meanwhile, repeat soaking the remaining 4 croissant pieces in the egg mixture.
Transfer the French toast to a serving plate. Melt the remaining 1 tablespoon unsalted butter in the pan and repeat cooking the remaining four croissant pieces. Dust with powdered sugar and serve with maple syrup, whipped cream, or fresh berries as desired.
Refrigerate leftovers in an airtight container for up to four days. Reheat at 300 F until warmed through, 8 to 10 minutes.
Note: Eight small croissants (about 1 ½ ounces each) can be used in place of large. Soak and cook the halved croissants in two batches (it may be a tight fit in the pan).
___
Fans of apple fritters will find lots to love in this apple fritter breakfast casserole recipe, which makes clever use of croissants to replicate the flavor and feel of the classic pastry.
___
Chia seed pudding
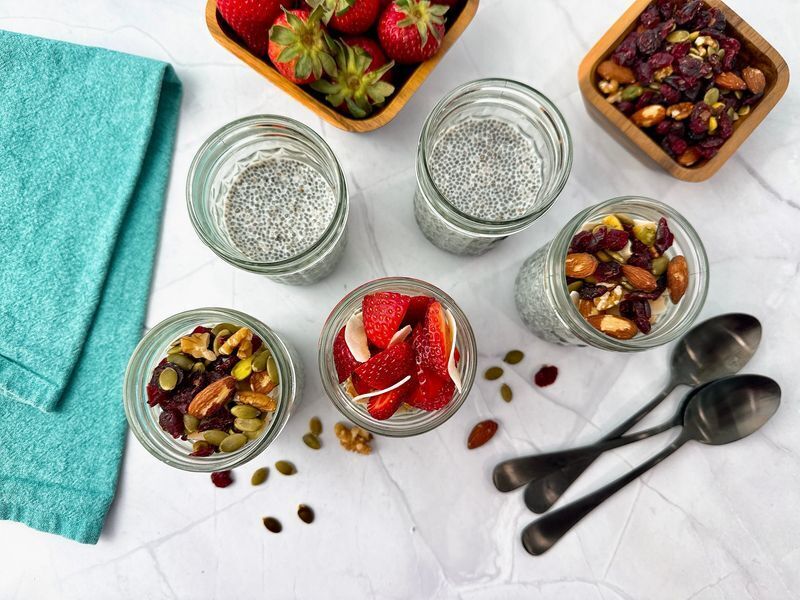
This creamy pudding is a true delight — it’s satiny-smooth, sweetened with honey and studded with tender little chia seeds. You need just three ingredients to get started and then the variations are limitless.
Breakfast through dinner (and even late-night snacking), this chia seed pudding is sure to become a regular part of your healthy eating rotation. The magic is in the chia seeds.
Refrigerate this chia seed pudding in an airtight container or mason jars with lids for up to 5 days. You may also freeze this chia seed pudding (in an airtight container or mason jars with lids) for up to 1 month. Thaw overnight in the refrigerator before serving.
Pro tip: Refrigerate and freeze your chia seed pudding without toppings. Add desired toppings just before serving.
Makes: 1 serving
Ingredients:
- 2 tablespoons chia seeds
- ½ cup milk of choice, such as cow’s milk, nut milk, or plant milk of choice
- 1 tablespoon honey or sweetener of choice (optional)
- Toppings of choice (see above for inspiration)
Instructions:
- In a small bowl or glass jar (I used 8-ounce mason jars), combine the chia seeds, milk and sweetener (if using). Mix well. Let stand for 5 minutes.
- Mix again to ensure there are no clumps. If there are clumps, break them up with the back of a spoon.
- Cover with plastic wrap or a lid and refrigerate for at least 2 hours, preferably overnight.
- Top with desired toppings and serve
— Robin Miller, The Republic
___
The Dutch baby may have a slightly bizarre name, but anyone who has tried the fluffy, pancake-like breakfast dish knows that there's nothing bizarre about the taste. This recipe features sugar- and cinnamon-coated apples, lending a fresh and sweet flavor to the fluffy, homemade Dutch baby.
___
Buttermilk skillet pancakes
You don’t need anything fussy here. The best Southern pancakes are about restraint and technique, not tricks. The mistake most people make is overworking the batter and chasing fluff with gimmicks instead of structure.
Ingredients
- 2 cups all-purpose flour
- 2 tbsp sugar
- 1 1/2 tsp baking powder
- 1/2 tsp baking soda
- 1 tsp kosher salt
- 2 cups buttermilk (real, not a milk + vinegar hack if you can help it)
- 2 large eggs
- 1/4 cup melted butter (plus more for the pan)
- 1 tsp vanilla (optional, but rounds it out)
Instructions
Heat your pan first on medium heat, cast iron if you’ve got it. Let it sit a good 5 minutes. This matters more than anything.
Mix dry ingredients. Whisk together flour, sugar, baking powder, baking soda, salt.
Mix wet ingredients separately: buttermilk, eggs, melted butter, vanilla.
Pour wet into dry. Stir just until combined.
Lumps are not a problem. Overmixing is.
Rest the batter (5–10 minutes). This is where structure forms. Skip it and you get flat pancakes.
Butter the skillet lightly. You want a thin film, not a pool.
Pour about 1/4 cup per pancake in the skillet.
Wait for bubbles and edges setting, which should take about 2–3 minutes. Flip once, cook another 1–2 min. Don’t press them. That’s how you kill the lift you just built.
— Mackensy Lunsford, Southern Kitchen

TheKitchn.com is a nationally known blog for people who love food and home cooking. Submit any comments or questions to editorial@thekitchn.com.
